By The Rawtarian

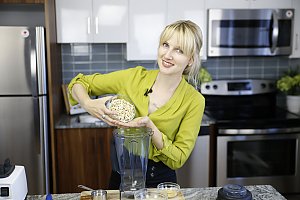
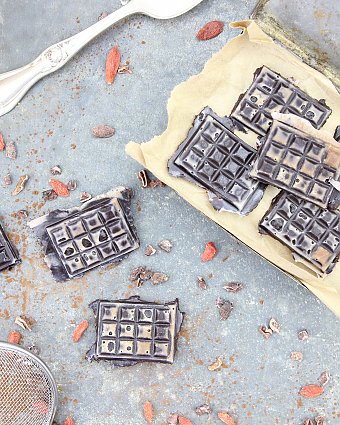
In this video, The Rawtarian shows you how to make raw chocolates.

A blender is required for this recipe. 

Video Transcript

I’m Laura-Jane, The Rawtarian, from therawtarian.com. And today, we are making chocolate. So easy and actually tastes delicious.  A little bit of patience is involved, but I think it’s worth it.

All we’re going to be doing is blending these ingredients in the blender and pouring them into molds like this. Or if you don’t have any of this, just pour onto like a cookie sheet or in a big brownie dish. Like just pour it in something so that it can be skinny. So a big casserole dish. Whatever.

The ingredients that you need for this recipe would be 1 cup of raw cacao powder, ¾ of a cup of coconut oil. Your coconut oil should be liquid and that happens when it is warmish. It shouldn’t be solid and chunky. If it’s solid and chunky, put hot water in a bowl like this. Quite hot. And you’re gonna just put your chunky coconut oil—I hope you can see this—in the bowl. Just ultimately, you just want to melt the coconut oil but you can make it. 

And if you sit it like this, it’ll melt quite easily if you keep stirring it. Of course, you’re not mixing these things together. You’re just creating a double boiler so to speak.

Anyway, if your coconut oil is clear and transparent like this, you’re good. That’s 3/4 of a cup. 

This is also ¾ of a cup of maple syrup. It’s the best sweetener for this recipe. You could use others, but I definitely prefer maple syrup for sure. And we have ¼ of a teaspoon of pure vanilla extract. 

So all we’re going to be doing—once we pour it into the molds, we do have to wait like maybe 5 hours. 3, 5 hours. But like I said, it’s worth it.

So when blending, we always start with the creamy, sort of liquid stuff first. So this is the coconut oil. And another thing I’ll mention as well is this recipe, you want to have everything kind of organized beforehand like your molds out because you don’t want to have it sitting too long in the blender after it’s blended. You want to blend and pour right away because sometimes, it can kind of separate and get weird if you’re too slow.

So just make sure you’re organized like this. That was, of course, cacao powder. And what we’re going to do is just blend and even if you have a crappy blender, this should work just fine. And make sure that lid is on tight, and you’re gonna blend from low to high until you have sort of liquid chocolate gold. 

But first, you must plug it in. It is plugged in. first, you must turn it on and then you go from low to high.

It’s blending quite well. I’m just going to show it to you and then sort of stir it a little bit. Not sure if you can see this. Really, it’s already looking quite good. You know what? I’m almost going to say that it’s done. There’s a tiny layer of cacao powder that didn’t quite get blended at the top, but look at it. It’s chocolatey, amazingly, chocolatey goodness.

So now what we are going to do, and like I said, if all you have is a big dish, kind of—well, I won’t waste time but, at the end, I’ll show you another option. But I have these silicone molds. This is my favorite one. It makes little chocolate bars.

Basically, all you’re going to be doing is pouring the chocolate into the molds, and these are bars. I’ll just make one of these chocolate bars. It tastes good, even at this stage, but what we want is hardened chocolate bars. Bars.

And these are also silicone molds. You might—these are really easy to find. These individual ones, you can find them as cupcake holders. Silicone ones. And they’re very, very inexpensive as well.

So all you do is we’ll do the bar first. Hopefully, you can see this. Just smooth it out and like seriously. Delish. Chocolate. Tasty.

That really just tastes like chocolate sauce at this point, and the only thing that is going to change when we freeze it is the consistency and the texture. The solidity. So those are—that one is probably fine. And basically, I’m just leaving this one till last.

And if you go to my website and look at the actual recipe for this, right now anyway, the photo that I’ve used is you’ll notice has these little waffle prints and that is because I used this mold. And I love silicone molds. I never use metal pans anymore because these are so much easier to get everything out of. Because you’ll see in the second part of this video or at the end of this video, when I come back with the frozen result, you’ll see how easy they are to pop out because they’re flexible. 

So that’s essentially the gist of these chocolates. They’re definitely my favorite chocolate recipe in terms of trying to make chocolates. And lastly, I mentioned before I was going to show you.

If you don’t have anything, any silicone molds, you could just pour the entire chocolate mixture into a glass dish, maybe something even bigger than this. Whatever you have, just make it work., you just want to make it so that’s it not too thick so just pour a thin layer and just freeze this, and then you could just cut into it like chocolate. 

So basically, we’re gonna pop these in the freezer for like I said, it doesn’t take too long, maybe like certainly at least 3 hours. But by 5 hours, they should be pretty solid as long as they’re not too thick. And certainly if you leave it overnight, they’ll be perfect

Now like many other of my recipes, you need to keep these in the freezer until you want to eat them. Because very quickly within half an hour, if this was frozen solid, at room temperature, it would turn back into chocolate goop again. So you can’t send thse in kid’s lunches. They are gonna melt on the bus at the morning. They’ll be kind of goop at the end, but they’re delicious.  You can eat them right out of the freezer. 

This is my go-to recipe for chocolates. They’re awesome. And I will just say we’re gonna throw these in the freezer and I’m gonna come back shortly and show you how hard they are.

It is about 5 hours later, and I have frozen our raw chocolates by The Rawtarian. Here they are. Listen. Boom.  It really has maybe only been 4 or 5 hours so it hasn’t been too long. You can wait that long for chocolate. And here we go. Let’s go in order.

I’m the type of person I always save the best for last, so watch this.

Chocolate.

Chocolate.

So these will be called little chocolate bundles. These are chocolate bars. These pans or molds are financier pans or molds. Check it out! Oh baby! Chocolate bar #1. Oh baby!

Chocolate bar #1. Oh baby! 

Chocolate bar #3. Oh snap!

They’re there. See? They’re supposed to look like gold bars. They’re kind of like upside down granola bars. So that was fun, right? Chocolate bars.

So what I actually do at home, I pop them out of the molds. I guess this is what I do. I might leave them in or just go like this on a sheet like this and throw this back in the fridge. Freezer. Not fridge.

And like I said, save the best for last and look how cute it is. Remember our mold? Please work. I feel like this I’m scared all of a sudden. So I see I wasn’t very fastidious about the edges. It just kind of—ah yeah, it might need to go a little longer. Why? Why, Rawtarian? Why? Why is it being difficult? I don’t know why. Maybe I need to cut it.

Okay. I save the best for last and I actually was saving the worst for last. Why? Why, chocolates? They’re punishing me. I don’t know. How do I normally do this? 

Oh my gosh. No. it’s gone a mess. Oh. This is so sad, but you get the gist. Those ones worked. I think they haven’t quite been in long enough. This is painful.

Or maybe I do normally—how do I do this normally? Oh my gosh. What should we do? I think we just keep going. I think this is real life. 

I think if I wasn’t doing this on film with you right now, I would just be like oh, these need a little more time and I’ll put them in the freezer. See, these are close.

Being in the kitchen is a scary place. Yeah, they need more time, but I want to show them to you.

Okay, I think I might have gotten one. But see? You’ll see my photos. We got one. It’s really sad looking. But you’ll see my photos and I did it perfectly before in the past. And the only thing is we need to let them sit for longer.

So good though. 

So that is how you make raw chocolate. And like I said, they do just probably need a little longer so maybe more than four hours. But as you can see though, the reason is like this: if I cut it, it’s not quite as solid. It’s kind of like the equivalent of a cookie that has a soft center right now.

Yeah. But look how tasty. Oh my gosh. So good. Chocolatey. Fudgy. Longer. Bye. 

Top voted

All

Leave a Comment

The Rawtarian wants to hear from you! Let's get the conversation going! Leave a comment or review below.